Whether you intend to use the mesh creation facility that Autodesk provide via your A360 cloud storage (not offered anymore unfortunately) or whether you will be modelling yourself from your point cloud you first have to make some scans.
This is relatively straightforward.
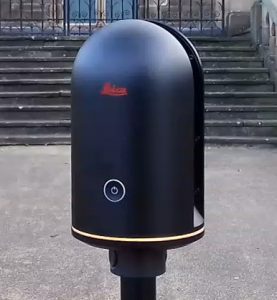
Position the scanner in the first location, switch it on then choose a spot for you to stand in – ideally out of sight of the scanner – but not so far away that somebody could sneak up and steal it! Watch out for how long you depress the button as this can launch a standalone scan. Here’s what it says in the BLK360 manual for how long to hold the button and what it does:
- Press and hold the button <0.5 sec. The BLK360 is off. The BLK360 switches on and the LED starts blinking yellow.
- Press and hold the button <0.5 sec. – BLK360 is on and ready. The LED is continuous green. After counting down for 10 seconds the BLK360 starts recording and the LED starts blinking yellow.
- Press and hold the button <0.5 sec. – BLK360 is in Power Safe mode. The LED is off. The BLK360 is ready again. The LED turns to continuous green.
- Press and hold the button >2 sec. – The LED is continuous green. The LED starts blinking yellow and the BLK360 switches off.
- Press and hold the button > 5 sec. – The BLK360 switches off immediately. Hard shutdown.
Here’s a couple more excerpts from the BLK360 manual that I consider the most essential information – section 2 and section 3.
Switch on the iPad and connect to the wifi network that the BLK360 is producing – if you have lost your paperwork then you can find the wifi password printed on the sticker inside the battery cover. You should not need the password once it’s been connected once.

Launch Recap Pro on the iPad.
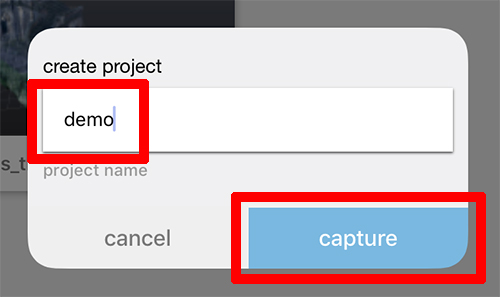
Select New Project or click on an existing one if you wish to add more scans to it.

Fill in a name and then hit ‘Capture’.
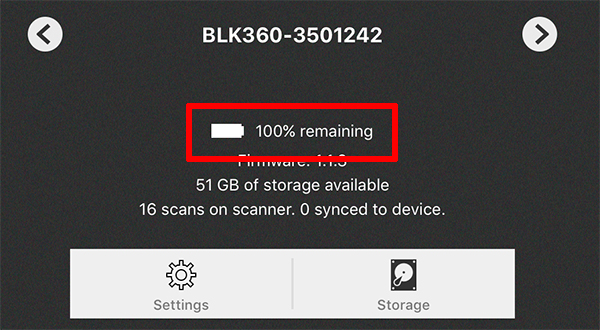
It should detect the BLK360, look carefully at the bottom left – it will indicate the battery level onboard the BLK360.
If you do need to change a battery mid project it’s fine, just suspend the project on the iPad. Switch off scanner, swap battery, restart scanner and reconnect wifi.
If you accidentally switch off the iPad that can be a bit messy – you will probably need to wait for the scanner to finish what it is doing. It would probably be wise to rescan from the same place in case the data has been corrupted in any way.
Don’t switch Bluetooth off mid job either – it is using Wifi and Bluetooth simultaneously. You can lose contact with the scanner quite easily if you stand behind something very thick/dense – like a heavy stone wall.
This is an important moment – you need to decide the Scan Density you require for your scan – I often (probably wrongly) refer to this as resolution in other posts). You set the scan density via the settings ‘cog’ icon.

This is also where the options for the 360 photograph (the real-view) is located. Adjust accordingly depending on lighting conditions.
Post-processing is for white balance and Push-Button Scan settings are something I have not yet tried but if the iPad does die on you then you can continue to make scans and sync the files later … or just do the whole job using the push-button if you are confident no settings need adjusted. Note the density has to be decided from the iPad – so if you don’t know what density it was left at by another operator then you are stuck or risk doing abortive scans.


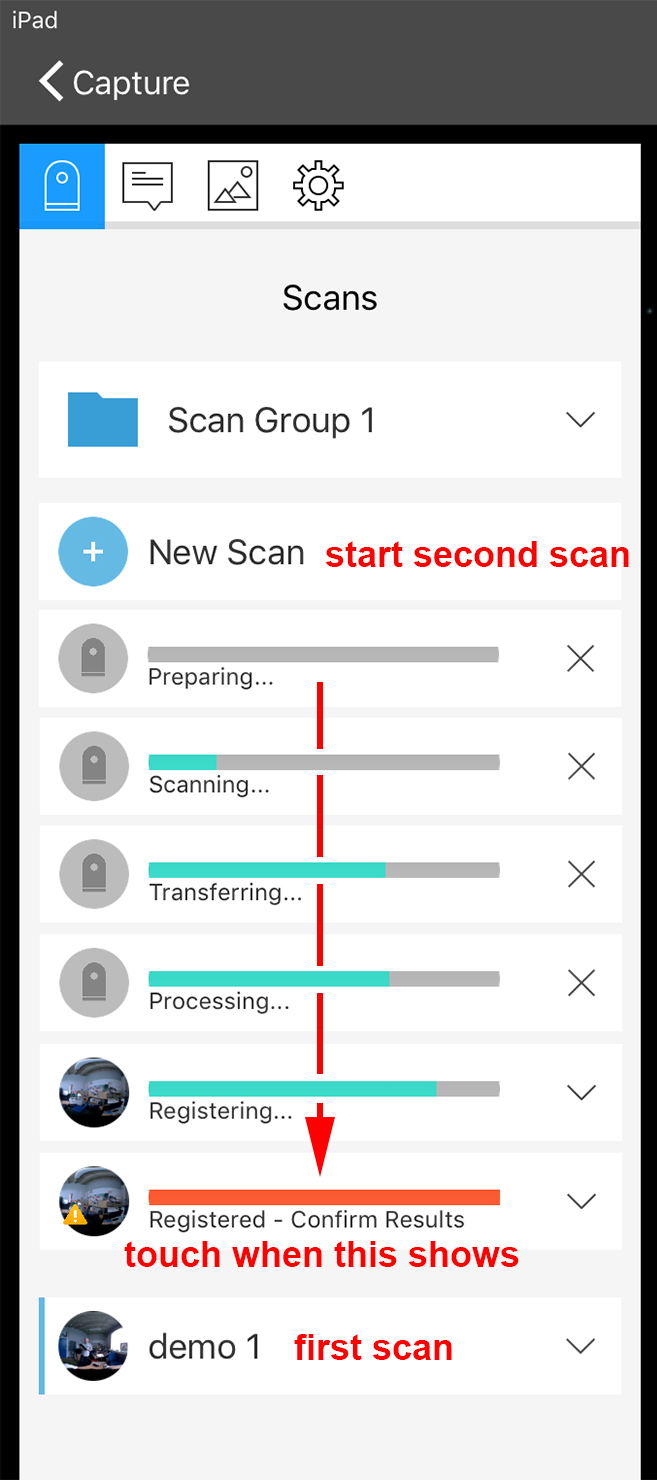
Ready to start the FIRST SCAN ? touch the ‘New Scan’ button.

You should see a progress indicator that also tells you what is happening, a beep at the end tells you when the scan is ready for checking or that the registration (lining up of scans) needs your input.

When complete the progress bar changes to a thumbnail image of the 360 view.
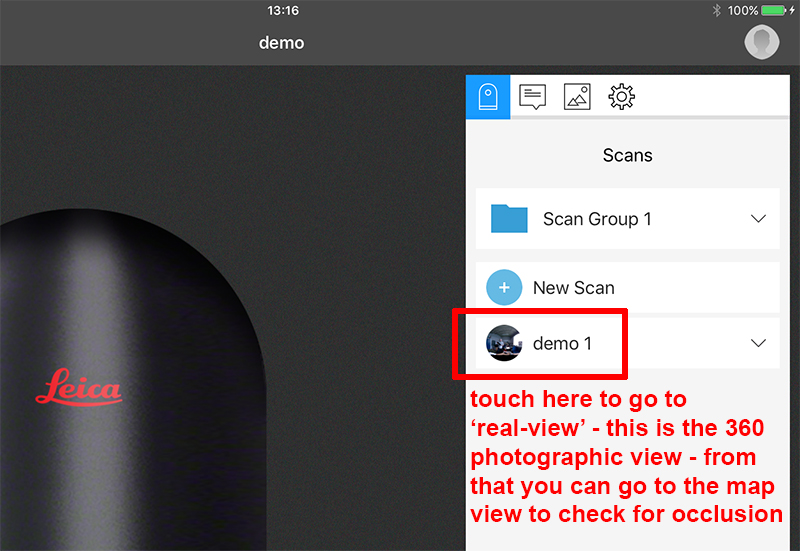
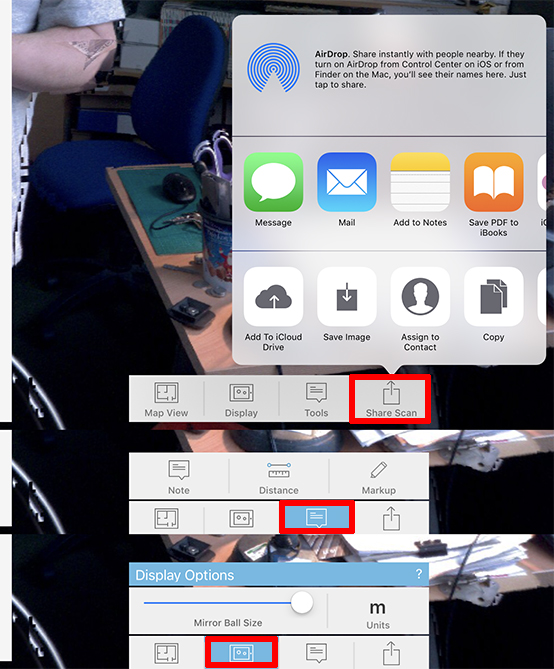
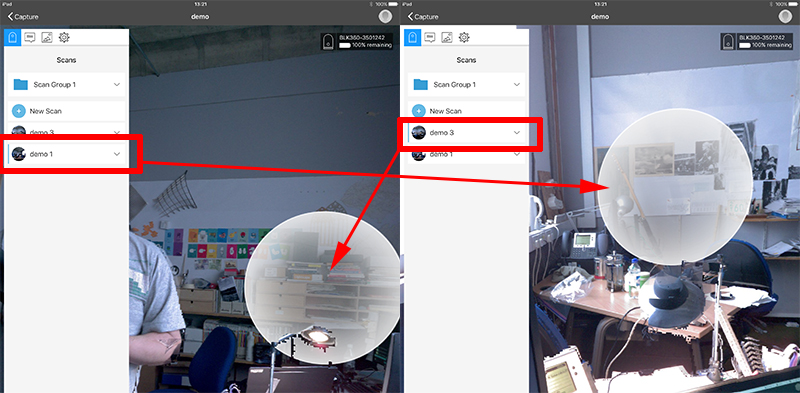
Touch the thumbnail and it will take it to the 360 image first – the ‘Real View’ … also called the mirror ball view. There are some tools available here that you might want to use:
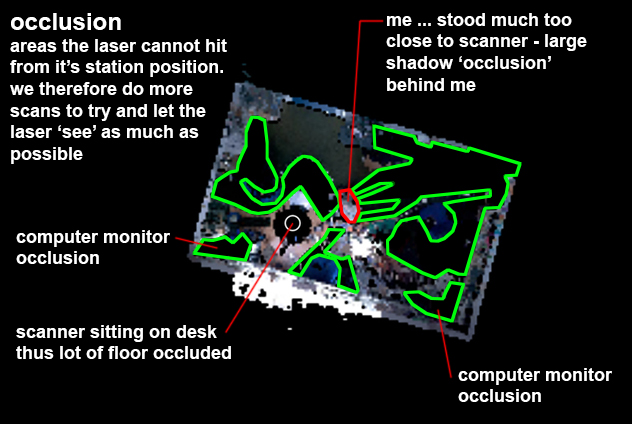
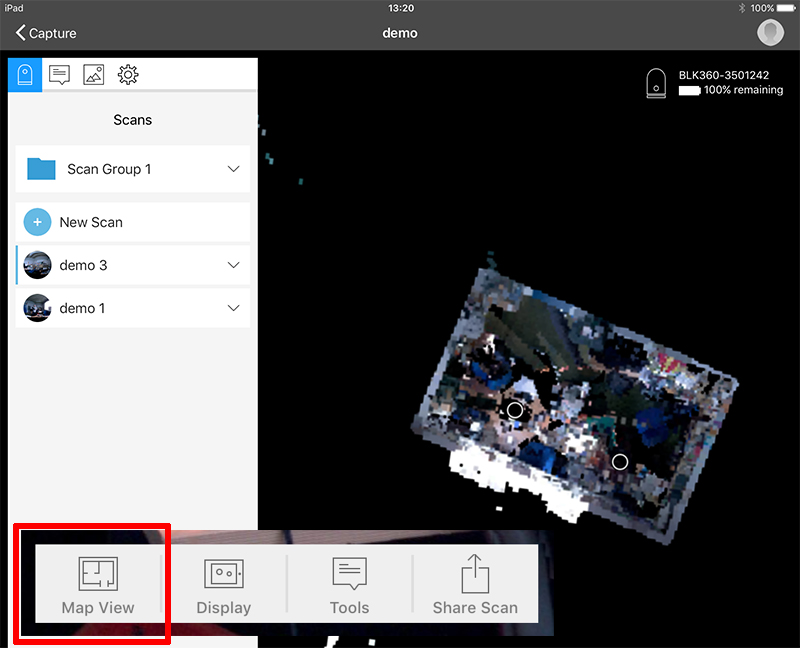
The more useful view is the ‘Map View’ – a plan only view that shows you very clearly which areas are occluded (blocked) from the scanners 360 path.

The above scan is of a room – the white points to the south of the room are points recorded out of the window – in strips because of the vertical blinds in the room.
What is ‘occlusion’ – hopefully this close-up of the above image helps:
Now move the scanner to the next ‘station’ and touch ‘New Scan’ again to start the second scan.
The two scans need registered – lined up. If the software finds enough corresponding points it will do this itself – if not you may need to manually register the scan. If you are in a hurry and do not have time to hang around for the Recap to do the registration on site then you should opt for the ‘Push-Button’ scanning – to be honest I am finding this more reliable as there is so much wifi traffic and interference around that the process is compromised greatly on site. See Registration page for more on this.
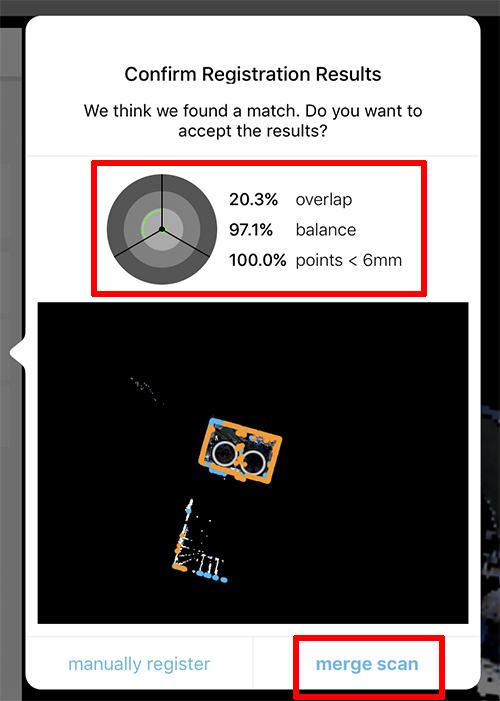
The results of the registration here are very good – there is a good amount of overlap with the first scan, the balance result is very high (lots of objects/shapes at different angles in the room and 100% of points are less than 6mm from each other – range restricted by wall outside. Notice the points in the top left … these are generated by reflections – there is a shiny cafetiere in the corner of the room and also a glass cabinet.
Touch ‘merge scan’ if you are happy.
The plan view gets updated:
We can switch to Real View – by clicking on the black dots on the map or via the large Real View button at the bottom of the screen.
Repeat until the last scan and then ‘Suspend’ the project.

You can speed up the scanning process by moving the scanner as soon as the iPad reports that the scanner is ‘Transferring’ – there is no need to actually wait for the full processing and registration – you can hit ‘New Scan’ straight away. The iPad is doing one job and the scanner is doing another at the same time – as the image below shows.

Low density 2nd + scans take just under 3 minutes from hitting ‘New Scan’ button to the ‘Merge Scan’ button after scan registration.
A similar scan done at high density takes much longer – just under 11 minutes. – approximately 4x longer. Bear this in mind. It’s still very quick for what it does but if you don’t need the additional density of points then it’s a lot of wasted time if you have lots of scans to do … and may drain batteries much faster.
Medium density scan of the same test scene took just under 8 minutes.
Now move on to desktop operations – watch the video on page ‘When It All Goes Right’.
