Even on a very modest project it is easy to generate many gigabytes of data – each time you do a ‘save as’ the scan files are duplicated minus however many points you have deleted.
Lets look at how the folder structure and their contents change as you progress through your project – we are looking at the desktop PC once the project has been pulled in to Recap Pro.
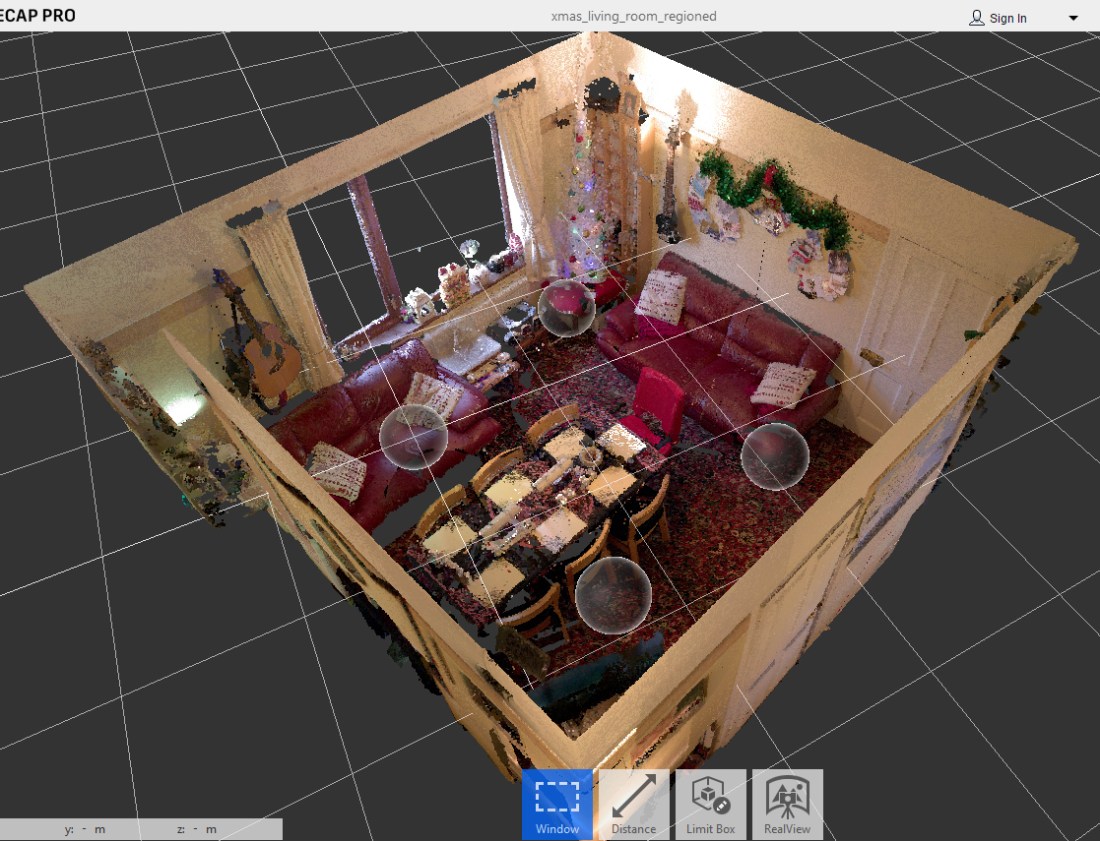
Project under scrutiny here is my living room scanned on Christmas day – just before the ‘outlaws’ arrived for Christmas dinner.
The scanner was positioned in 4 places to get a decent coverage.
For each scanner position a number of files are generated grouped in sequence – as you can see below plus some ‘standard’ files like the backup ones at the bottom of the list – the .bkx files:
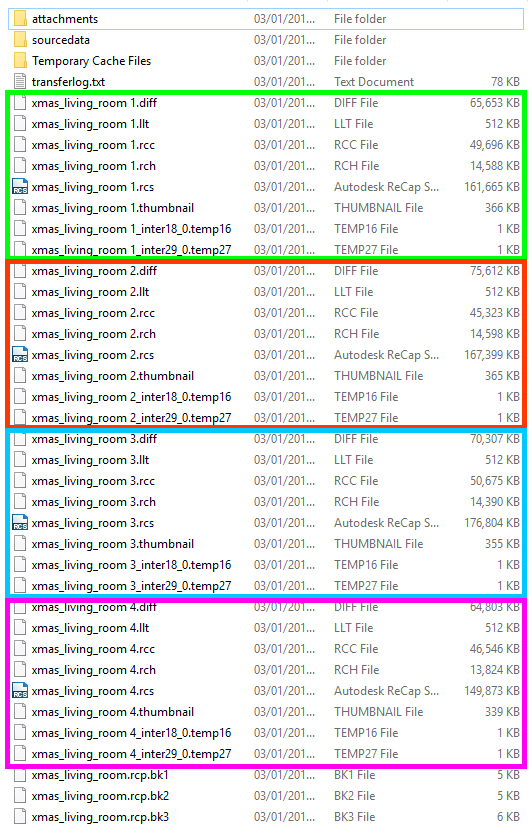
The above image is from the ‘post indexing’ stage.
Let’ try and be systematic and describe the structure above.
‘attachments’ – this is additional info you might have added in the iPad app – like notes, dimensions, etc. Size of folder here is 0 as I added no notes.
‘sourcedata’ – this is the photographic info prior to stitching, for this 4 scan project this folder measured 1.39 gb. Here’s what it looks like inside:
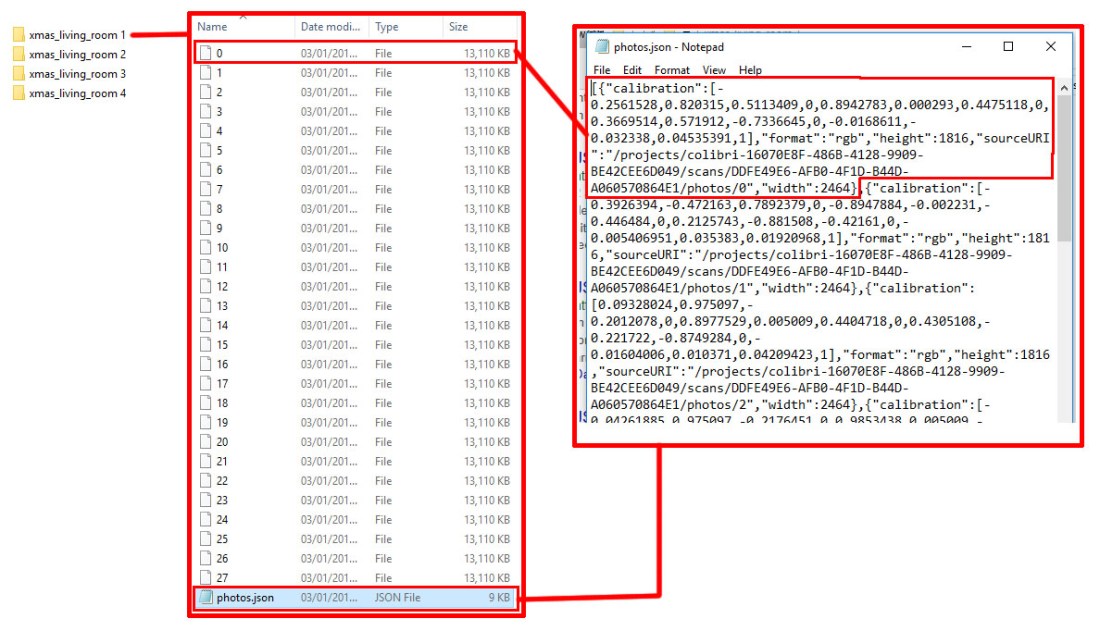
Each scan has it’s own sourcedata folder, there is always 28 image portion files plus a .json file which is a javascript description of the photographic data. When we do a ‘save as’ this information does not get replicated thankfully to the newly named folder.
‘Temporary Cache Files’ – as the name suggests this is just temporary info while you are working. Deleting this folder once Recap is closed is OK – it will regenerate the folder the moment you open the file again. The temp files are not crazy big but for archiving there is no point retaining it. They are basically your undo/redo states as you are working.
‘transferlog.txt’ – a file that only exists in the first folder structure – disappears when you do a ‘save as’. Possibly useful in quality control situations.
‘.diff’ … ‘.llt’ and ‘.rch’ – these 3 file types are consistent in the groups as you can see. What they are however needs clarification – I have emailed Leica to ask them to advise. .diff is usually a ‘difference’ file – it catalogues the difference between one file and another – you would think this is something to do with registration therefore. .llt could be a GPS related file going on my research but it could also be a dtabase file. .rch is a mystery – it disappears once you do a ‘save as’.
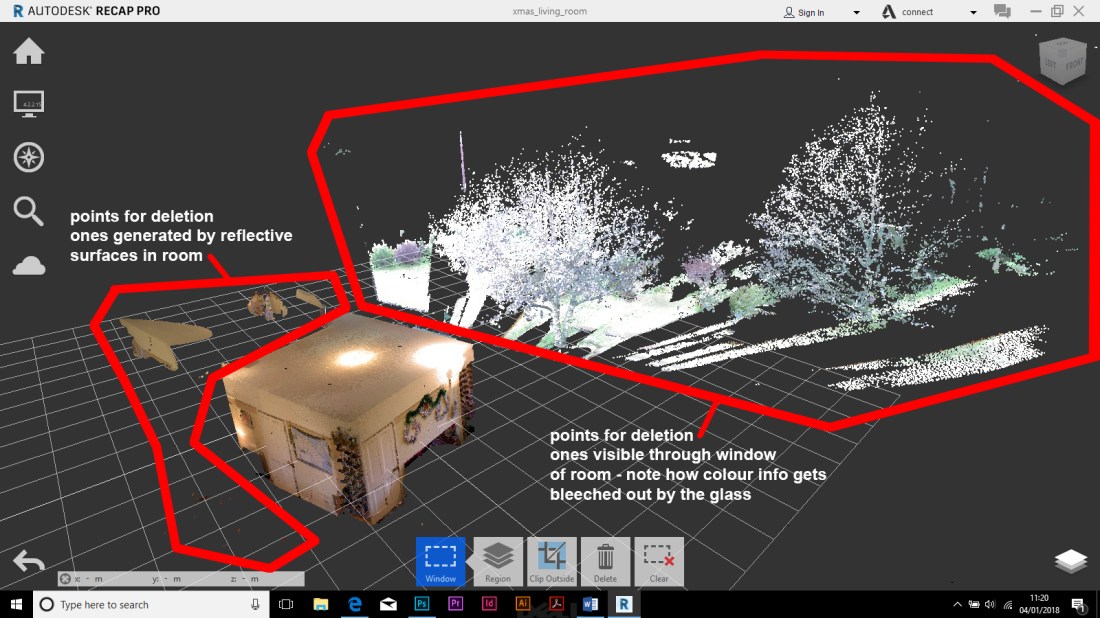
‘.rcc’ is the 360 photograph – your ‘Real View’ image. Delete these and things get a bit weird in Recap Pro … click on a mirror ball and you get a flashing screen as it tries (and fails) to find the 360 image.
‘.rcs’ – this is the ‘main man’ – this is your point cloud data for that particular scan station.
‘.thumbnail’ – is the thumbnail of the Real View.
‘.temp16’ and ‘.temp27’ – not sure about their particular use. Hopefully Leica can elucidate.
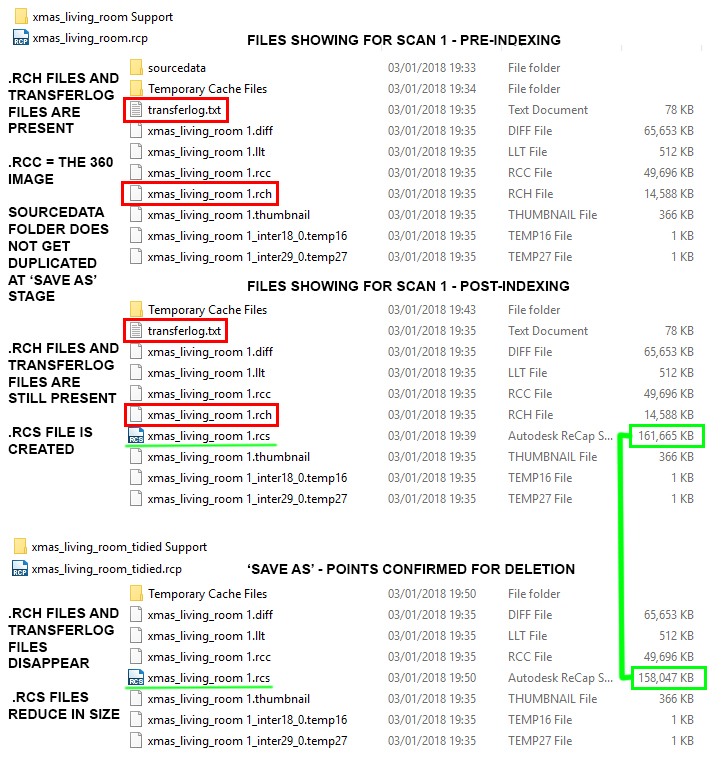
The image below shows the 3 main stages and how a group of files changes.
The 3 stages are –
1. Pre-Indexing – folder looked at once images pulled in to Windows 10 – file and support folder size 2.06gb
2. Post-Indexing – file and support folder size increases to 2.73gb
3. After some unnecessary points deleted and I did a ‘Save As’ – combined file and new support folder contents drop to 1.15gb – this is mostly due to the photographic info being omitted and a small reduction in the cloud sizes (the .rcs files).
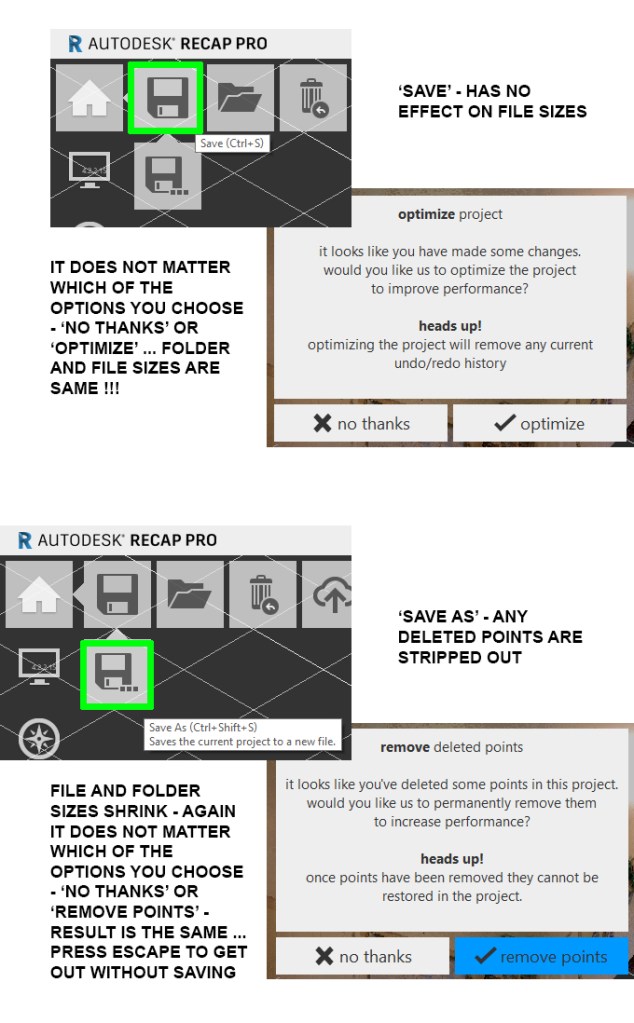
I then created a ‘region’ (put the ceiling on to it’s own layer) – did another ‘Save As’ – this had no effect on file sizes.
There is something else you should be aware of – the difference between ‘Save’ and ‘Save As’ – one prompts you as to whether you want to optimize the files – this is removing undo/redo info. While the Save As asks whether you wish to remove points you have deleted permanently. NB the original scans will still be intact because a ‘Save As’ copies the .rcs files and then dumps the points from the copy.
The worked example here is just a 4-scan project – you can appreciate how quickly the amount of data can accumulate if you are needing 50+ scans. Make sure you have an external drive available for backups/overspill.
